Showing posts with label Lima Beans. Show all posts

Tuesday, June 1, 2010

Get Growing in June

Get Growing

Welcome to our seventh Get Growing entry. This series will span 12 months, and is designed to help aspiring vegetable gardeners get out of the kitchen and into the garden. On the first of each month, we will discuss one garden project for the novice vegetable gardener. Because we are located in Houston, Texas, our growing conditions differ from many parts of the English-speaking world. To help guide gardeners in cooler climates, our Get Growing partner is Daphne of Daphne's Dandelions. Daphne gardens in Boston, and she will be providing monthly advice for Northern gardeners (although her excellent site is a wonderful resource for gardeners everywhere). This month, Daphne discusses fall transplants for the Northeast and fighting diseases.  Regardless of where you live, her advice is invaluable.

Vegetables that Love the June Heat

May was quite warm, with daily temperatures often hitting the high 90's.  There were a few days that offered relief thanks to overcast skies and rain, but now that it's June, we are guaranteed to have four months straight of serious heat.   There are many vegetables that we planted earlier in the year that will survive these temperatures, including melons, squash, and snap beans, but not many that should be started this month.  Some, including tomatoes, may survive but stop producing flowers and fruit until the temperatures cool off in the fall.  Others, especially the last of our fall vegetables, are quickly dying off.  There are a few vegetables, though, that love our summer weather.  These include eggplant, okra, basil, cowpeas, cucumbers and chile peppers.  If you haven't already started these vegetables, June is a good month to do so.  
Lima (Butter) Beans

Another great crop to start now is lima beans, also known as butter beans.  These plants really love the heat, and seeds for bush beans can be planted as late as July in Zone 9.  Because pole lima beans, and in particular Christmas Lima Beans, take such a long time to mature, they really should be planted this month. 

If you're from the frozen and canned vegetable generation like we are, you probably think you hate lima beans, particularly that awful succotash combo we were all forced to eat that combined lima beans and corn for an amazingly flavorless, mushy and wholly unappealing dish.  Fresh lima beans, though, are a different matter entirely.  They are extremely rich and dense, with a distinct flavor that we love.

The fact that they are productive, easy to grow, highly nutritious, and versatile in the kitchen will further endear these beans to you.  There is only one drawback to growing lima beans, as opposed to snap beans, from our perspective.  This is the work involved in removing the edible beans from the pods.  We admit that this is not an enjoyable process, and can only recommend that you sit in front of the tv for distraction during this tedious chore.
Butter Bean Varieties 

When deciding whether to grow bush or pole lima beans, there are several factors to consider.  The first is how much time you have, both before you want to harvest the beans and before your weather will kill the plants.  Bush beans mature more quickly, making them an ideal choice if you want to pick limas in the next few months.  They're also a good choice if you're getting a late start, and have only a few months before cool weather starts.  Pole beans mature more slowly, but produce for a longer period of time.  Our pole beans were still loaded with pods when the first frost hit in late November.  They also produce more beans, and the beans tend to be larger.

A second consideration is how much space is available in your garden.  Pole beans take up less room because the plants grow vertically, but the vines become quite tall and full.  While pole limas are not an option for our front yard where we include only low-growing vegetables, bush limas are well-behaved and look quite attractive in our front border.  Remember that the harvest is not the pod itself, but the beans inside.  It takes A LOT of pods to get a pound of beans, so it's not worth growing limas if you only have room for a few plants.

A third consideration is taste.  Bush limas are smaller than pole limas, with a softer texture and delicate, buttery flavor.  These are the beans that earned lima beans the nickname butter beans.  Pole beans, though, are also wonderful with a hearty, nutty flavor.   

If you can't decide and have enough room in your garden, grow both types of limas.  The bush limas will provide an early, delicious harvest while the pole limas will produce pounds of beans over a long period of time.  Bush varieties that we recommend are Dixie Speckled Butterpea, Henderson's Bush and White Dixie Butter Baby Lima.  Our favorite pole varieties are Christmas and Florida Speckled.   This year, we're also trying two lima beans for the first time, Jackson Wonder Butterbean (bush) and White Christmas (pole). 


How to Grow Lima Beans

Because butter beans are a member of the legume family, try to plant them in a section of the garden that has not recently contained other legumes to avoid soil-borne diseases.  Seeds need warm temperatures in order to germinate, certainly not a problem in Zone 9 in June.  

Plant the seeds about an inch deep in a sunny part of the garden in soil with good drainage and lots of organic material.  If you have fresh, high-quality seeds, the germination rate will be excellent.  This means that almost all of the seeds will produce healthy, vigorous seedlings.  To avoid having to thin later, plant the seeds about 5 inches apart for bush beans and about four inches apart for pole beans.   If you end up with gaps where the seeds don't germinate, you can go back in and add new seeds to fill in the holes.  

For bush beans, we plant the rows quite close together to maximize production in our urban garden.  We leave just enough room to walk between rows while harvesting, about a foot and a half.  Plant pole beans at the back of the border to avoid blocking the sun from reaching your other plants.  If you don't already have poles or stakes in place for the pole beans, it is best to drive these into the soil at the same time that the seeds are started.
Keep the seeds well-watered until they germinate, then be sure to water frequently during hot, dry spells.  A thick layer of mulch is a good idea to conserve water and keep the soil evenly moist.  The plants will first produce flowers, then beans.  Bush beans will be the first to mature, in around two months.  Pole beans can take a lot longer, particularly the really big beans such as Christmas.  Do not give up hope if months go by without a single flower.  Eventually, you will be rewarded with a huge crop of gorgeous lima beans.  Of course, then the real work begins when you have to remove them all from their pods.
When to Harvest Butter Beans
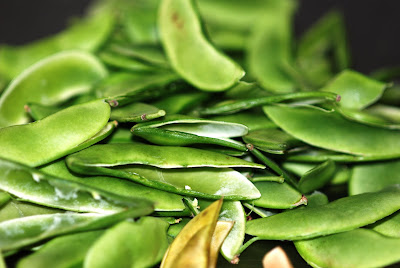
Since butter beans are grown for the mature beans inside, it is important not to harvest too early.  If you do, inside will be a tiny, immature bean which is not much use in the kitchen.  Instead, wait until the pod looks plump and full, and you can see the shape of the rounded bean filling the pod.  Feel the pod too.  If there are no gaps between the seeds, they are probably ready for harvest.  Each pod typically contains two or three butter beans.
After harvesting, bring the beans inside and try to cook them within a day or two.  We prefer not to refrigerate our beans because it tends to diminish the flavor dramatically.  Just store them in a cool place in the kitchen.  Don't remove the beans from the pod until you want to cook with them.
How to Eat Butter Beans

In our opinion, these beans are best eaten when fresh.  They can, however, be dried and saved for later use.  Many vegetable gardeners just leave the pods on the plants to dry out.  But in Houston, our summers are so humid that the beans do not dry well if left outside.  In fact, they usually either start sprouting in the pod, or become molded and unusable.  If you live in a similar climate, bring them inside after harvesting, remove from the pods, and place them somewhere that gets good air circulation.  Try not to pile them on top of one another in a big bowl because they won't dry well.  instead, we spread them out on a plate in the kitchen where we enjoy watching the transformation as the beans dry.
Good for You and They Taste Good

Lima beans are an excellent source of dietary fiber, protein, folate, potassium and iron.  Just one cup of lima beans contains 14g of protein and over 50% of the daily recommended amount of vitamin C.   Limas also provide vitamins B6, K and niacin.

But don't worry that good nutrition means bad flavor.  Fresh butter beans are wonderful in pastas, rice dishes, salads and even pureed as a spread or dip.  They are familiar to anyone from the South, but are so versatile they can be used in any number of Indian, Italian, African or Asian recipes.  The problem for us has never been finding ways to use our harvest, but rather with harvesting enough to make anything at all.   Because the beans have to be removed from the pods, remember to harvest about 2 1/2 times the weight of the limas you'll need in the kitchen.  And, try to draft your kids, friends, neighbors, and anyone else you can find to help you shuck the beans.

Growing Edamame (Soybeans) 
Fall Transplants for the Northeast and Fighting Diseases

StumbleUpon.com

Wednesday, November 11, 2009

Slow-Cooked Florida Speckled Butter Beans and Sorrel


Sadly, lima bean season is coming to an end.  Eating freshly picked butter beans for the last few months has been a revelation and the limas will be sorely missed.  To celebrate the last big harvest of the year, we use a slow Mediterranean cooking technique to highlight the rich buttery flavor of these beans.  Sorrel freshly-picked from the garden adds a mellow lemony flavor.  This is a weekend recipe -- total cooking time approaches six hours although the active time is barely 20 minutes.

Slow-Cooked Florida Speckled Butter Beans and Sorrel
serves 4 - 6

Ingredients

1      cup      fresh Florida Speckled Butter Beans
                   (or other fresh lima beans),
                   removed from pods
4      Tbs     olive oil
2       cups   vegetable stock
2                 onions, sliced thinly
5                 garlic cloves, sliced thinly
1                 dried red chile (small), diced
                   (we used a dried cayenne from the garden)
1                 bay leaf
1      cup      sorrel, thick stems removed and blanched
                   (about 2 cups when fresh)
                   salt and black pepper to taste

Procedure
  1. In a big pot of boiling water, cook beans about 10 minutes.  Drain.
  2. Put beans back in same pot, cover with fresh water, and simmer for 1 hour.
  3. While beans are cooking, combine onions, garlic and chile with 3 Tbs olive oil in a 2 qt. pyrex dish.  Mix well, cover with aluminum foil, and bake at 300 for one hour.
  4. When beans are done, drain and add to onion mixture in the pyrex dish.  Add vegetable stock and bay leaf.  Return to oven, covered, for one more hour.
  5. Saute the blanched sorrel in 1 Tbs olive oil until soft and set aside.
  6. When beans have been in the oven one hour, remove from oven and add sorrel.  Add salt and pepper to taste.  Return to oven, uncovered, and bake 15 minutes.
  7. Remove from oven and let sit 3 hours before eating to allow flavors to develop.  Keep at room temperature -- do not refrigerate.
  8. Serve with cheese bread and thick Greek yogurt.

Slow-Cooked Florida Speckled Butter Beans and Sorrel made the Foodbuzz Top 9 today! The Foodbuzz Top 9 is a photo-driven collection of top-buzzed posts within the Foodbuzz community.  Congratulations again, and thanks for being a part of Foodbuzz!  Cheers, The Foodbuzz Editorial Team.

StumbleUpon.com

Monday, October 19, 2009

Fresh Lima Bean Hummus


If you're feeling fatigued reading our third consecutive entry about lima beans, imagine how we feel.  Eating from the garden every day means cooking with what is available, even if it means eating the same vegetable for days on end.  Luckily, we have not yet hit the lima bean saturation point.   In fact, after months of eating eggplant every night, limas still feel like a novelty.  The fact that these beans are so adaptable has helped immensely.

We've been craving Middle Eastern food lately, so David decided to create a hummus made with fresh lima beans instead of the standard (canned or dried) chickpeas.  We used a mixture of lima varieties from the garden, and added our fresh parsley, cilantro, mint and dill as seasonings. The hummus, a lovely smoky green color, was thick and filling, with a flavor quite distinct from traditional hummus.  To round out the meal, we sauteed thin slices of Sfumata di Rosa eggplant (yes, we're still harvestiing eggplant!) and served the hummus and eggplant with warm pita bread, feta, fresh Marketmore cucumbers and Matt's Wild Cherry tomatoes from the garden.   Eating from the garden has rarely been better.


Fresh Lima Bean Hummus

Ingredients

1 1/2     cup         Fresh lima beans, removed from pods
1/2                       onion, chopped
3                          garlic cloves, skins removed and smashed
1/2         tsp          salt, plus more to taste
                            black pepper to taste
1          cup          water
1/8       cup          Italian parsley, chopped
1/8       cup          cilantro, chopped
1 1/4    tsp           cumin
1/4       tsp           cayenne pepper
3          Tbs          lemon juice
3          Tbs          olive oil
3          Tbs          tahini
1          Tbs          fresh dill, chopped
1          Tbs          fresh mint, chopped


Procedure
  1. Combine beans, onion, garlic, 1/2 tsp salt and water and simmer, covered, until beans are tender (about 12 minutes).
  2. Remove from heat, uncover and add parsley and cilantro.  Let steep 5 minutes.
  3. Drain water.  Add cumin, cayenne, lemon juice, olive oil, dill, mint and tahini and puree until smooth.  We added more salt at this point, and black pepper.  You may need more lemon juice too.
  4. Sprinkle with sumac.  Serve with warm pita. 

StumbleUpon.com

Saturday, October 17, 2009

Brothy Mediterranean Lima Beans


Eating from the garden often means eating the same vegetable for days on end.  If you've been following us for a while you know that we've had eggplant almost every night for months.  Literally, months.  Before that it was snap beans daily.  They took forever, but now the big producers in the garden are the lima beans.  There are baby limas, gigantic Christmas limas, Carolina pole limas, and Florida speckled limas.   Lima beans are well-suited to the Southern garden because they love the heat which is never in short supply here.   They take a long time to mature, but then they provide a long, extended harvest.

Unlike the bland frozen beans I remember eating while growing up, fresh limas are full of flavor and absolutely gorgeous.  We've been experimenting with different lima recipes to keep it interesting every night.  The limas have impressed with their versatility.  They're also very filling, high in protein and fiber, and an excellent source of folate, iron and potassium.   Best of all as far as David is concerned, they're NOT eggplant.

Two nights ago we had an Italian soup with lima beans.  Last night, David decided to cook a Middle Eastern-style dinner.  We had a simple salad with fresh cucumbers and tomatoes from the garden, and Brothy Mediterranean Lima Beans.  We used a combination of limas from the garden.  The cooked beans turned shades of lavender, pink, and white in a warm aromatic broth.   Delicious, and definitely not monotonous.


Brothy Mediterranean Lima Beans

Ingredients

1 1/2         cup           fresh lima beans
                                 (or whatever you manage to harvest),
                                 removed from pods
3/4            cup           water
2               Tbs           extra virgin olive oil
2               Tbs           fresh Italian parsley, chopped
1               Tbs           garlic, minced
1/2            tsp            sea salt
                                 black pepper
1               Tbs           lemon juice
                                  bread for dipping
                                 (we used Middle Eastern cheese bread)

Procedure

  1. Combine water, beans, 1 1/2 Tbs olive oil, 1 Tbs parsley, garlic and salt.  Cover and heat over medium until beans are cooked, stirring occasionally.  We used a combination of fresh limas in different sizes (probably not the best idea because the small beans cook more quickly).  Everything, including the gigantic Christmas limas, was done after 12 minutes.  If using only baby limas, check after 8 minutes.
  2. Remove from heat.  Season with salt and pepper to taste.  Add lemon juice, 1 Tbs parsley and 1/2 Tbs olive oil.  Serve warm, and use bread for dipping.

StumbleUpon.com

Thursday, October 15, 2009

Pasta e Fagioli with Christmas Lima Beans


Last fall at our restaurant, we made a pasta fagioli soup inspired by a recipe in Domenica Marchetti's The Glorious Soups and Stews of Italy.  This is a beautiful book that we purchased at our favorite cookbook store, The Cook's Library, in L.A.  This soup was my first exposure to Christmas lima beans, and I was so enamored of them that I decided to grow them in our garden this summer.  These giant limas are hearty and filling, the perfect bean for a soup eaten on a blustery autumn day (in Houston that means it's in the 80's).


These limas are positively gigantic, and when dried they are a lovely speckled burgundy.  The fresh beans are even prettier in shades of white, pink and fuscia. If you have read our previous entries bemoaning the long and slow process to harvest, you know that Christmas limas do not provide instant gratification to the gardener.  The vines started in April are lush and full, but it is only now that we are harvesting our first beans.   At home, we decided to make a vegetarian spin on Marchetti's soup using fresh Christmas limas, rosemary, and cayenne pepper from the garden.  Good things do indeed come to those who wait. 

Pasta e Fagioli with Christmas Lima Beans
(based on the recipe by Domenica Marchetti)

Ingredients

2       cups      Fresh Christmas Limas
                      (the original recipe uses 2 cups dried limas soaked
                      overnight)
1                    rib celery, minced
1                    yellow onion, finely chopped
3       cloves   garlic, minced
1       Tbs       fresh rosemary, minced
1/2    cup       olive oil
8       cups      vegetable stock
                      sea salt to taste
1/8     tsp       finely chopped dried cayenne pepper
8        oz        orzo pasta
                     parmesan cheese
                     homemade pesto
                     ciabatta or similar bread     

Procedure
  1. In large pot, combine beans, celery, onion, garlic and rosemary.  Add 1/2 cup olive oil and stir to combine.
  2. Add vegetable stock and bring to boil.
  3. Reduce heat to low and simmer over low until beans are tender.  The fresh beans cook much faster than dried, so keep an eye on your soup as it cooks.
  4. Puree 1/2 the soup and add back to remainder.  Season as needed with salt, and add minced cayenne.
  5. Return soup to boil and add pasta.  Reduce to gentle simmer until pasta is cooked.  The pasta will thicken the soup considerably.
  6. To serve, drizzle with olive oil and top with freshly grated parmesan.
  7. We eat the soup with pesto crostinis. To make the crostinis, brush both sides of slices of ciabatta or similar bread with pesto and toast in a pan or on the grill. 

Pasta e fagioli with christmas lima beans made the Foodbuzz Top 9 today! The Foodbuzz Top 9 is a photo-driven collection of top-buzzed posts within the Foodbuzz community.  Congratulations again, and thanks for being a part of Foodbuzz!  Cheers, The Foodbuzz Editorial Team
     

StumbleUpon.com

Sunday, October 11, 2009

Garden Pu Pu Platter with Crunchy Baby Lima Beans


When David was growing up, his family dinners were very predictable.  Thursday was meatloaf night, Friday was spaghetti.  Perhaps as a reaction against that routine, he refused to cook us the same dish twice for dinner.  Each night was a new recipe, with results that ranged from the spectacular to the inedible.  One constant was that we rarely ate before 10:00 at night as David forged his way through yet another unfamiliar recipe.   By the time dinner was finished, David was usually exhausted and cranky, the kitchen was a disaster area, and I was ready to go to sleep.

While I appreciated his efforts and loved the variety, too many nights of gnawing hunger and late nights forced me to suggest that David create a repertoire.  Not the strict schedule he grew up with, but a collection of tested recipes that he could draw from when planning dinner.  For our restaurant, we use a software program called Living Cookbook to store our recipes.  When the chefs (inevitably) lose a recipe or it gets covered in grease, we just print out a new copy.

For the house, we decided to go low-tech.  We purchased a binder, and David filed all his favorite recipes inside.  We still set aside several nights each week for experimentation, but we have a few nights each week to enjoy our favorites and spend the rest of the night relaxing.  This routine has been complicated somewhat by the vegetable garden.  Other than eggplant (which is always in supply right now), it's hard to know what will be ready from the garden each night.  So the key has been to keep the kitchen well stocked with basics (which for us means things like tofu, feta, couscous, onions, and spices) so that we can harvest each night and design the dinner accordingly.


Sometimes this means edamame on the side, other nights we have fresh snap beans or senposai.  Even though we have introduced a bit of regimentation to the schedule, we still have amazing variety thanks to the garden.  Last night is a perfect example.   From the garden we harvested cucumbers, tomatoes, dandelion greens, arugula, lima beans and (of course) eggplant.  David decided to make a salad, with some cooked vegetables on the side.  The result:  a garden pu pu platter with Jerusalem Salad (part of the repertoire) using the dandelion greens, arugula, cucumbers and tomatoes, plus sauteed eggplant and crunchy lima beans on the side.   The eggplant harvest was a combination of thai long green, rosa bianca, cloud nine and black beauty.  Each kept its color, making for a beautiful side dish in shades of green, purple and white.

The baby limas were also a mixture of varieties -- Dixie Butterpea, Fordhook 242, Henderson's Bush, and White Dixie.  David prepared Crunchy Lima Beans -- crunchy on the outside, still soft and creamy on the inside.  Easy to prepare, with a flavor that can't be beat.

Crunchy Baby Lima Beans

Ingredients

1-2       cups       fresh lima beans (removed from pods)
                          sea salt
2           Tbs       olive oil


Preparation
  1. Boil salted water.  Add lima beans and blanch 3 - 5 minutes.
  2. Drain in a colander and run beans under cold water to stop the cooking process.
  3. Heat olive oil over medium heat.  Add lima beans, sprinkle with sea salt, and saute until they are slightly shriveled and dry-looking on the outside (about 5 minutes).  Remove immediately to avoid over-cooking.  Serve right away.

StumbleUpon.com

Thursday, October 1, 2009

Butter Beans


After growing snap beans, lima beans require a bit of an adjustment.  The plants take much longer to mature and flower.  Then, once there are finally bean pods, its a long wait for the beans inside to mature.  New pods are small and flat.  After the pods enlarge to full-size, the beans start to develop.  You can assess the size of the beans by holding the pod up to the light.  At first, the beans will look like tiny flat circles.  It's time to harvest when the pods are fat, there's no space between the beans, and the pod starts to lighten around the edges.

After such a long wait, it seems fair to expect instant gratification from the harvest.  But lima beans have to be taken out of their pods first.  This is tedious work, so put on the tv and get to work.  When I saw the beautiful butter beans our garden produced, I started to forget all about the long wait, the back-breaking work looking for the mature pods, and the hard labor involved in extricating the beans from their pods.   And our fresh limas taste as good as they look.  In fact, the fresh limas are so tasty that now I'm thinking that they may be worth the wait after all.

StumbleUpon.com

Friday, September 25, 2009

Christmas Lima Beans -- does the name mean we have to wait until Christmas for them to mature?


At our restaurant, we made a minestrone last winter using Christmas lima beans.  I was captivated by the huge, colorfully speckled beans, and couldn't wait to grow them in our garden.  The seeds started back in April have turned into a thick wall of vines over 7 feet tall.  Despite sporadic flowering during July and August, there have never been any beans.  This week I was planting some arugula seedlings next to the vines and I spotted the biggest bean pod I've ever seen.  When I looked more closely, I found many more equally large pods.  They are all quite flat, so I'm predicting an October harvest at the earliest (five months from when the seeds were started).  After the long wait, I hope the beans live up to expectations. If nothing else, the kids were amazed to see the giant bean pods in our back yard and they're planning to share them with their classmates for show and tell.

StumbleUpon.com

Tuesday, September 22, 2009

Butter Beans and Tofu


After waiting four months for our limas to mature followed by finger-numbing minutes spent extricating the beans from their pods, we wanted a quick and easy way to prepare the limas.  This stir-fry fits the bill.  The taste is amazing despite the minimal effort, and actually tastes like a fusion of Italian and Chinese cuisine.  David attributes this unusual flavor combination to the use of cooking wine in the recipe.  The recipe is from a great little pamphlet-style cookbook written in both Chinese and English devoted to tofu in all its forms.


Tofu & Lima Beans
(adapted from Chinese Style Tofu! Tofu! Tofu! by Mu-Tsun Lee)

Ingredients

1/2       pound         firm tofu, cut into 1/2" cubes
4          1" sections  green onion
1          cup             fresh lima beans, removed from pods
1/2       cup             sliced mushrooms
1/3       tsp              salt
1/3       tsp              sugar
1/3       tsp              pepper
2          Tb              cornstarch
1          Tb              cooking wine
1          cup             vegetable stock
3          Tb              sesame oil

Procedure

1.  Heat sesame oil, saute green onions until fragrant
2.  Add lima beans and mushrooms and saute briefly
3.  Combine salt, sugar, pepper, cornstarch, cooking wine, vegetable stock with 1/3 tsp sesame oil, then add to lima beans.
4.  Add tofu and saute until sauce thickens, about 3 minutes.


Grow Your Own is an event originally
hosted by Andrea of Andreas recipes.
This month it is being hosted by DiDo at
http://mowglichic.blogspot.com.

StumbleUpon.com

Monday, September 21, 2009

Fall Seeds Started


This weekend it finally felt like fall weather is coming.  The temperature peaked in the low 90's and the humidity was down making for great gardening weather.  Saturday morning was dedicated to my older son's tennis tournament (he won!), but the rest of the weekend I was out in the garden.  It was overcast for most of Saturday which is perfect for transplanting, so I tried to get the last of the seedlings in the ground.  I planted Yu-Choy (see photo), Choho, Kyoto Mizuna, Endive (Broadleaf Batavian), French Sorrel, and Dill.  I still have a few seedlings that need some room in the garden including Wild Arugula (Rucola Selvatica), Anise, Yellow Pear tomatoes started from cuttings, and Common Sorrel, but they'll have to wait until next weekend.

The garden looks so much neater without the hundreds of grower pots that filled every free inch a few weeks ago. and I am out of potting soil, so I decided to start the next batch of seeds directly in the garden.  I have mixed feelings about direct sowing.  It is much easier once the seeds are started because there is no transplanting required, but the seeds germinate much better in potting soil and grower pots.  Also, I do a lot of interplanting so its not always easy to find room to start all the seeds in one place.

I decided to clear out the last of the cowpeas and edamame growing in the back yard, creating a nice patch ready for new seeds.  I started beets, brussel sprouts, broccoli, fava beans, turnips, royal burgundy bush beans, Trevisio-type radicchio, red orach and rutabaga in this area.   In our windowbox, I planted nasturtium and mache seeds.  I also planted the rest of the rhubarb seeds among the existing seedlings.  Now it's just a matter of watering and waiting to see how all the seeds do in the garden.

Sunday morning was for harvesting.  First came eggplants -- sfumata, thai long green, cloud 9, and thai hybrid tiger.  I left a lot to be picked later this week and still filled a huge mixing bowl with eggplant.  I also harvested okra and a massive quantity of lima beans.  I have several types of lima beans which I was careful to plant in different parts of the garden, but they took so long to produce that I just combined everything in one bowl as I harvested yesterday.  So much for my original plans to make productivity and flavor comparisons.  Lima beans require a lot of patience -- they were planted out four months ago and this was the first real harvest.  I had already ruled them out for next year as a result, but I have admit that the taste of fresh lima beans is pretty amazing, so maybe they were worth the wait.  David made a Chinese tofu and butter bean dish that was fantastic.  I'll post the recipe tomorrow.

StumbleUpon.com