Thursday, April 29, 2010

Swiss Chard Rib Gratin with Pine Nuts and Parmesan

An easy way to enhance flavor when cooking with vegetables or grains is to use vegetable broth instead of water. This technique works wonders whether you're making a soup, cooking grains like couscous, farro, bulgur or arborio rice, or braising vegetables.  The broth adds depth and flavor without adding fat, acting as a natural flavor enhancer.  Grains cooked with vegetable broth become rich and distinctive, and soups do not miss the standard chicken broth when vegetable broth is used instead.  We always keep vegetable broth on hand because it is such an easy, effective way to intensify flavor.  The next time a recipe calls for cooking a vegetable or grain in water, try using broth instead to boost the flavor dramatically.

In this recipe, vegetable broth turns Swiss chard ribs into a rich and complex gratin.  The ribs, which are normally discarded in favor of the leaves, take center stage here.  Working with the ribs is a bit time-consuming, perhaps the reason the leaves are often preferred.  But the delightful results may make you regret all the Swiss chard ribs you've discarded in the past.  The dense texture of the ribs combines with the cheese and pine nuts to create a hearty and filling dish.  They also keep their intense red color, making for a dish that is both beautiful and satisfying.  This is vegetarian comfort food at its best.
Swiss Chard Rib Gratin with Pine Nuts and Parmesan

Ingredients
4                 lbs            Swiss chard, washed and leaves removed, 
                                  leaving about 2 lbs of ribs (use leaves 
                                  for another recipe)
1                                 lemon
1/4              cup           pine nuts
2                 cup           vegetable stock
1                 cup           parmesan, grated
1/4              cup           celery leaves, minced
1/2              cup           parmesan, cut into small cubes
1/4              cup           basil, cut into thin strips

Procedure

  1. Preheat oven to 450° and place rack on highest row of oven.
  2. Fill a large bowl with cold water.  Cut lemon in half, then juice and add lemon halves and juice to bowl of water.
  3. Cut Swiss chard ribs crosswise (against the grain, like chopping celery) into thin, even slices.  Add these slices to the lemon water.
  4. Toast pine nuts in a small, dry skillet over low heat, shaking regularly, until evenly browned and fragrant, about 2 minutes.  Remove from heat and set aside.
  5. Drain Swiss chard ribs and place in a large saucepan with the vegetable stock.  Cook, covered, over moderate heat until tender, about 10 minutes.  Remove Swiss chard from liquid and place in a pyrex dish.  Discard the liquid.  Cover the ribs with the grated cheese and bake until the cheese is golden and bubbly, 5 to 7 minutes. 
  6. Remove from oven and sprinkle with celery, pine nuts, cubed cheese and basil.  Return to oven until cheese and pine nuts are browned, 4 to 6 more minutes.
Printable Recipe


Other Vegetable Matter recipes using vegetable broth to enhance flavor include:
Fresh Chickpeas with Couscous, Grains and Haloumi
Brothy Meditteranean Lima Beans
Fresh Chickpea, Bulgur and Mint Pilaf
Granny Smith Apple Risotto
Chickpea and Lentil Pilaf
Arancini with Fresh Mozzarella, Petit Pois and Toasted Pistachio
Italian Breakfast Chickpeas

StumbleUpon.com

Wednesday, April 28, 2010

Salad with Dandelion Greens, Ricotta Salata and Toasted Almonds

Bitter greens with tangy, salty cheese and toasted almonds combine for a salad packed with complex flavors.  This is a Lidia Bastianich recipe based on a traditional Italian salad.  Italian Dandelion plants have proved truly remarkable, surviving hot and cold equally well with no pest problems and an amazing ability to quickly recover after being harvested.   The greens have a distinct bitter flavor that identifies Italian dandelions as a member of the chicory family, which includes favorites such as escarole, endive and radicchio as well as chicories more difficult to find in the U.S. such as Puntarelle and Barba di Cappuccino.   Italian cuisine has a unique appreciation for all these bitter greens, and this dandelion green salad gets it just right.

Ricotta Salata is an Italian sheep's milk cheese. The cheese, sometimes called dried ricotta, is pressed and dried before it is aged, giving the cheese an unusual, almost spongy texture and concentrating the salty, tangy flavor.  This bright-white cheese is fairly dense but still soft, and is wonderful with salads, pastas and even flatbreads.  To create perfect shavings, chill the cheese well first and then use a vegetable peeler.

Salad with Dandelion Greens, Ricotta Salata and Toasted Almonds 

Ingredients

1           lb        freshly picked dandelion greens, washed, thick stems 
                       removed, and roughly chopped
6           Tbs     olive oil
1/4        cup     almond slivers
2           Tbs     red-wine vinegar
1           tsp      honey
                       Sea salt and black pepper to taste
1/4         lb      ricotta salata, shaved when cold using a vegetable peeler

Procedure
  1. Heat oven to 350° and spread almond slivers on a sheet pan.  Toast until golden and fragrant, 5 - 10 minutes.  Remove from oven and set aside, turn off oven.
  2. Combine olive oil, 2 Tbs almond slivers, vinegar and honey in food processor or blender until smooth.  Season with salt and pepper. 
  3. Toss dandelion greens with dressing, season again with salt and pepper.  Top with remaining almonds and ricotta salata.

Printable Recipe

StumbleUpon.com

Tuesday, April 27, 2010

Fresh Chickpeas with Couscous, Grains and Grilled Haloumi


Fresh chickpeas are instantly recognizable in form and flavor, but there are a few wonderful distinctions between fresh chickpeas and the more familiar dried or canned variety.  Perhaps the most interesting difference is that fresh chickpeas keep their beautiful green color when cooked, making for particularly pretty dishes.  In addition, the flavor is beanier and less starchy than canned chickpeas.  When fresh, they taste "green", which some describe as grassy, or pea-like.  Fresh chickpeas can be boiled, steamed or even sauteed in the pod like edamame, or removed from the pod and quickly blanched as we do here.

Chickpeas are easy to grow, although unlike most legumes, they prefer cooler temperatures.  We started our seeds, known as ceci in Italy where our seeds came from, in mid-November and started harvesting in March.  The low-growing plants are first loaded with lots of little white flowers, each of which turns into an individual chickpea pod.  The chickpeas are ready to pick when the pods feel full and hard, and it is not uncommon to find "twins" (two chickpeas to a pod) when the pods are opened.  Now that the temperatures here in Houston are hitting the 80's during the day, the leaves are starting to yellow and the last pods will soon be ready for harvest.

With our fresh chickpeas, we prepared a dish with mixed grains and haloumi.  The recipe is quite flexible, so feel free to change the grains or proportions as you like.  We add lots of fresh parsley from the garden, another plant that overwintered in our garden and is now flowering profusely before it dies back.  This recipe makes a filling meal for two, especially with the haloumi cheese on the side.
Fresh Chickpeas with Couscous, Grains and Haloumi
makes entree for two

Ingredients

1/2        cup    fresh chickpeas, removed from pods
                      sea salt for cooking chickpeas
1/4        cup    medium-grain couscous
1 1/4     cup    vegetable stock, brought to a boil
1/2        tsp     sea salt
1           Tbs    olive oil
1/2        cup    quinoa
1           Tbs    barley flakes
1           Tbs    oat flakes
1/3        cup    Italian parsley, freshly picked and minced
1                    package Haloumi, cut into 8 slices

Procedure
  1. Heat pot of water, add 1 tsp sea salt and cook chickpeas until tender, about 2 minutes.  Drain, run under cool water to stop the cooking process, drain again and set aside.
  2. Heat fry pan to medium high and grill haloumi until golden brown.  Flip and repeat.  Remove from heat, then cube.
  3. Once vegetable stock is boiling, add couscous and 1/2 tsp sea salt (or to taste).  Stir and then cover. 
  4. After 10 minutes, fluff couscous with a fork.  Mix in quinoa, barley and oats.  Add in chickpeas.
  5. Serve in bowls topped with the minced parsley, and the grilled haloumi cubes on the side. 
Printable Recipe 


Other Haloumi Recipes from Vegetable Matter:
Spiced Pear, Date and Haloumi Flatbread
Grilled Eggplant, Haloumi and Arugula Sandwich
Boca Burger with Grilled Haloumi and Lemon

Other Fresh Chickpea Recipes from Vegetable Matter:
Pasta with Fresh Chickpeas and Basil Sauce
Fresh Chickpea, Bulgur and Mint Pilaf

StumbleUpon.com

Saturday, April 24, 2010

Today in the Garden

Rattlesnake Pole Bean
Super Sugar Snap Pea, Flowering
Red Rib Dandelion
Cosse Violette Pole Bean
Cucumber Seedling, Yamato
Jalapeno, Mucho Nacho
Puntarelle, flowering
Wild Garden Chicory
Barba di Cappuccino
Yaya Carrots
Scorzonera
Dill
Radicchio
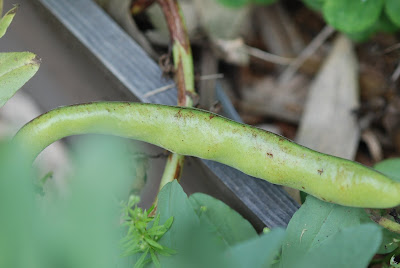
Fava Bean, Aquadulce
Chickpeas
Red Pontiac Potato Plants
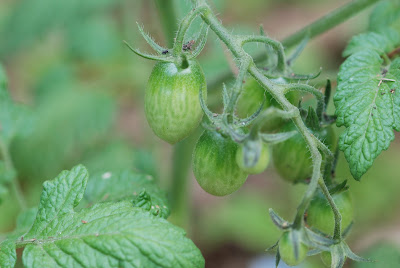
"Sugary" Tomatoes
"Sweet Million" Tomatoes
Nasturtium, Empress of India
Lacinoto (Dinosaur or Black) Kale
Buck's Horn
Elephant Garlic
Bunching Onion

StumbleUpon.com

Monday, April 19, 2010

Strawberry Cobbler

Beautiful strawberries are available everywhere right now.  Last week we made a Strawberry Rhubarb Pie which was gone all too quickly.  Here we use our favorite cobbler recipe to make an amazing strawberry cobbler.   The key here is the biscuit topping, crusty on the outside and soft and tender within, and buttery throughout.  The biscuit is also very versatile -- we've used the same recipe to make cobbler with blackberries; peaches; and (our favorite combo) strawberries and rhubarb.  It soaks up a bit of the fruit juices, and reheats well if you have leftovers.   This is a rustic dessert that does not require any baking skill.  Just dump the biscuit dough on top of the berry filling, bake and eat.  Proof that taste triumphs over form when it comes to dessert.  Perfect any time of day served warm with lots of creme fraiche on the side.

Strawberry Cobbler

Ingredients

Filling

6           cups             strawberries, wished and sliced
1/2        cup               sugar
3           Tbs               flour
1/2         tsp               orange zest

Biscuit

1 1/2      cup               unbleached A.P. flour
1/4         tsp                salt
1            Tbs               baking powder
2            Tbs               sugar, plus more for top
4            Tbs               butter, cubed and cold
1            cup               heavy cream
                                   8" pyrex baking dish or similar

Procedure
  1. Preheat oven to 325° convection (375° conventional). 
  2. Combine filling ingredients and place in pyrex baking dish.
  3. Make topping.  First, combine all dry ingredients.  Then cut in the butter to resemble coarse meal.  We use our fingers for this by rubbing the butter/flour mixture between my thumb and forefinger until the butter pieces are the size of a pea (some can be bigger than that).  You don't want the texture to be too smooth or the topping will lose its buttery richness.  You can also use a pastry cutter, food processor or forks to do this, but why create one more dirty thing to wash?
  4. Add cream and mix until uniformly moist.  Spoon out on top of filling.  It should be plopped on in clumps.  You don't want a perfectly smooth topping.  Sprinkle with granulated sugar for some sparkle.
  5. Bake until biscuit is golden brown and filling is cooking and bubbling.
  6. Let cool enough for the juices to thicken, then served warm alone or with whipped cream or creme fraiche. 

If you like this, check out our:
Blackberry Cobbler and Rhubarb Strawberry Cobbler recipes which use the same biscuit topping
You might also like our Mixed Berry Grunt which is a stove-top version of a cobbler

StumbleUpon.com

Saturday, April 17, 2010

Today in the Garden, and The Winner Is...

Ruby Red Swiss Chard
Sage flowering
Bunching Onion, flowering
Parsley, flowering
Tomato, flowering
"Sugary" Tomatoes
"Sweet Million" Tomatoes
Puntarelle, flowering
Punterelle
Forellenschuss
Merveille des Quatres Saisons (above)
Green Oakleaf (below)
Amish Deer Tongue
Nasturtium, Empress of India
Mache, flowering
Sasai Purple, flowering
Arugula Roquette, flowering
Ladybug larva
Aquadulce Fava Bean
Garlic
Morning Visitor - Kentucky Warbler

Escarole
Collards, flowering
Radicchio
Red Pontiac Potato

And the winner of our HOMETOWN SEED GIVEAWAY is Kelly of Vegan Thyme.

Congratulations!

Send us your mailing details, and Hometown will send you the Survival Seeds for your vegetable garden.

StumbleUpon.com